Install ERPNext
Update a ERPNext on Docker
- TAKE A SNAPSHOT AND/OR BACKUP OF ERPNEXT BEFORE STRATING
- ssh to the VM
- Pull new images, stop container, restart container (cf https://github.com/frappe/frappe_docker/blob/main/docs/02-setup/06-setup-examples.md#updating-images)
TODO - Add the list of commands for that
- flush the redis cache
sudo docker exec -it erpnext-docker-redis-cache-1 sh
redis-cli flushall
redis-cli flushdb
- restart container
TODO - Add the command to restart after redis flush
- do a bench migrate
sudo docker exec erpnext-docker-backend-1 bench --site frontend migrate
Setup a new ERPNext instance in Proxmox
This chapter describe how to start a new instance of ERPnext in a virtual machine
Current Proxmox server is availabel at https://pve.churra-tailor.ts.net
Install ERPNext on Dokploy (Prefered method)
TESTED, Worked for v15 and V16
- Install Dokploy in a new container via helper script runned in proxmox console
- Add tailscale in this container Add Tailscale to LXC container
- Access Dokploy by using conatiner-ip-address:3000 (dokploy.churra-tailor.ts.net:3000)
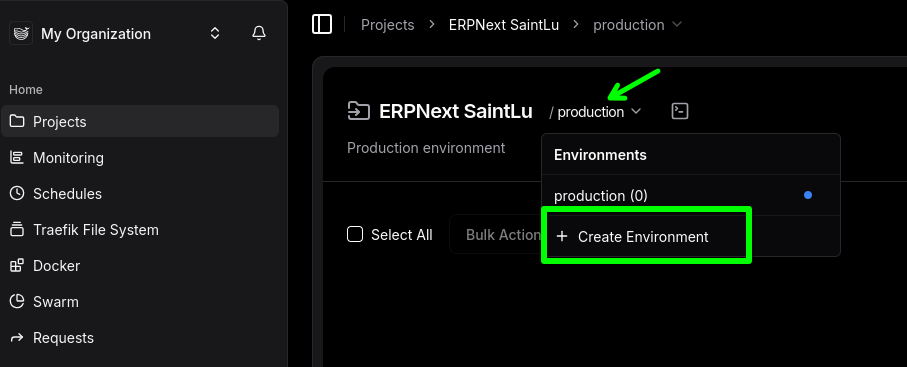
- Create a new project, for example "ERPNext SaintLu"
- Create new environments in this project, for example
- Sandbox
- Pre-production
- Production
- In one of the environment, Create a service, template, pick ERPNext in the list of templates.
- (Optional, but untested to go without) For this step you need a access to a domain name to create new A records, connect to your domain name provider
- Add a A record in a DNS redirecting to Dokploy's address.
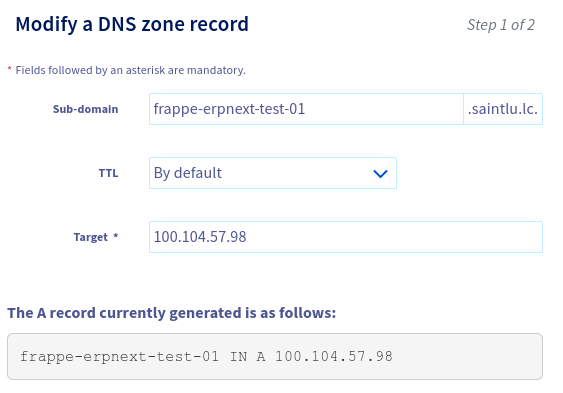
- In the Domains tab, change the domain to the url you just set up in the DNS, set HTTPS to true
- Add a A record in a DNS redirecting to Dokploy's address.
- In the Environment tab, change the site name to the name of the site you just created, change the version if needed
- Click Deploy and let it do it's thing (10-20min depending on the connection speed, check the logs of the container "create-site" to see when the website creation is done, it will shows
*** Scheduler is disabled ***once the setup is done)- /!\ At this point, if the connection is too slow the deployement can return an error, in the log it will shows
TLS handshake timeout. In this case retry until it goes through
- /!\ At this point, if the connection is too slow the deployement can return an error, in the log it will shows
- the website is accessible at the address showed in the Domains tab
- The administrator password is available in the environment tab
- /!\ A warning about the certificate will be displayed when going on the app for the first time, this is caused by the fact that the certificate can't be approved by an external authority since the website is only accessible internally, this warning can safely be ignored
- Repeat for the other environments.
Notes for potential issues:
- https://github.com/frappe/erpnext/issues/49955
- https://github.com/Dokploy/dokploy/issues/821#issuecomment-2582702464
Update ERPNExt on Dokploy
- Download the latest backup from /desk/backups
- Make a backup in Proxmox
- in Dokploy, click on Deploy, it will download and setup the latest version
- If the css and javascript does not load: Follow these steps (source)
Do this and let me know if you still face the issue:
get into redis terminal from dokploy:
redis-cli flushall
redis-cli flushdbtask: find in which docker to run this command, redis-cache, redis-queue or redis-socketio ? In doubt I runned the command in the 3 and it worked
Stop the compose.
login as root on your server:
docker system prune -aclick deploy or reload.
- If you get an
Error 500, connect to the containerbackend
cd sites
bench --site <ERPNext url> migrate
How to use Bench CLI
- ssh to the server with dokploy
ssh root@<ip of dokploy>
- Find the id of the docker container ERPNext backend. In dokploy by opening the logs or the terminal we can find the ids of the container. It will looks like that:
8e2d54479149` - Connect to the docker with ERPNext Backend
docker exec -it <id of the container> sh
Enable server scripts
bench set-config -g server_script_enabled 1
Archives
Create a Virtual Machine with Debian or Ubuntu
In this step we will create a new Virtual machine that will be used to install ERPNExt, the Digital ocean would be to "Create a new droplet"
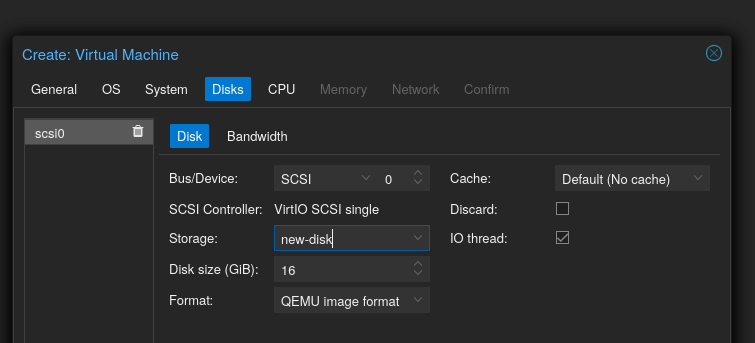
- In the proxmox UI, choose "Create a new VM"
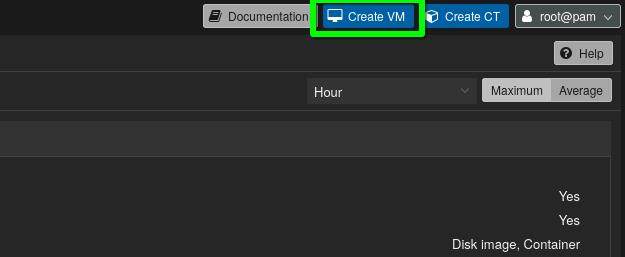
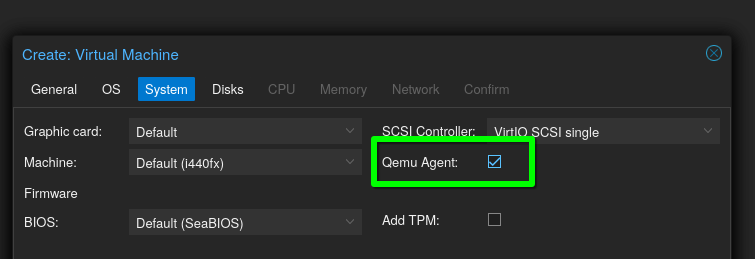
- Follows instructions
- Check the QEMU Agent checkbox
- In the "storage" tab, make bsure to pick a disk with enough space
Install the OS
In this step we will install the OS on the virtual machine, in Digital ocean this step is usually done automatically
- Start the VM
- Open the console from the web interface
- Follow the installation instructions
- Create an "erpnext_admin" user in the process
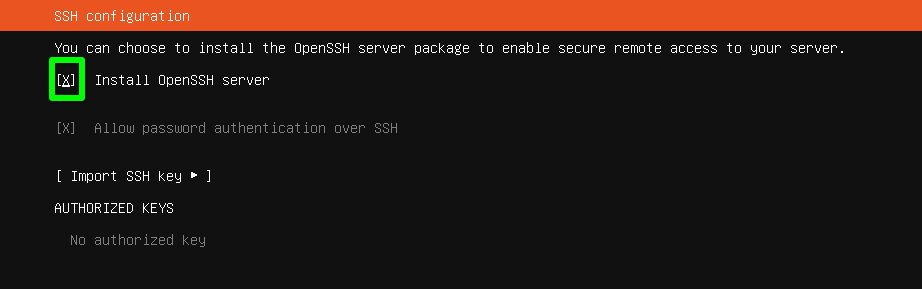
- Install the SSH server.
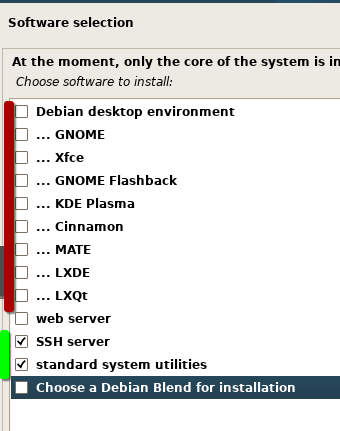
- (for Debian) Don't install a desktop environment
- Once the install is complete, click 'Continue' and let the system reboot
Create a snapshot of the fresh install
This way if there is an issue during the next steps, it will always be possible to quickly revert to a fresh install to restart the process

Connect to the newly created VM
- Option 1 - Via the web console (Not recommended)
- Option 2 - SSH directly with the LAN IP (only possible when connected on the local network)
ssh erpnext_admin@192.168.1.212
- Option 3 - SSH directly via tailscale (Recommended method, need to tailscale and setup tailscale first)
ssh erpnext_admin@machinename.churra-tailor.ts.net

OR

ssh erpnext_admin@100.199.199.199
- Option 4 - SSH usinhg a jump host (Use another system with tailscale as a jump host, a good way to start before tailscale is installed)
ssh -J root@pve.churra-tailor.ts.net erpnext_admin@192.168.1.212
- (Optional) Add your public ssh key to the machine for passwordless connections More informations
Install Tailscale
Install tailscale for remote access * Install curl
sudo apt install curl
- go on the tailscale admin page, selecte "add a new machine"
- Copy the script and laucnh it on the server
curl -fsSL https://tailscale.com/install.sh | sh && sudo tailscale up --auth-key=tskey-auth-xxxxxxx
- Start Tailscale
sudo tailscale up
- Take note of the tailscale ip
tailscale ip
- In the admin console, disable key expiry.
Install ERPNExt (manual Method)
Install ERPNext (Automated script)
TESTED, Worked on debian 13
- Copy the automated script on your server
wget https://raw.githubusercontent.com/abrefael/ERP-Next-16-installation-script/refs/heads/main/erp-next-installation-script.sh
- set the script to be executable
chmod +x ./erp-next-installation-script.sh
- execute the file ad follows instructions
./erp-next-installation-script.sh
- I used the tailscale url for the website address (testforwiki.churra-tailor.ts.net)
Install ERPNext (Docker, quick install)
TESTED, Worked on debian 13
- Install docker and docker compose, for debian see here
- Create a directory for ERPNext:
mkdir erpnext-docker
cd erpnext-docker
- Create a docker compose file using frappe pwd.yml as a reference, change the version number. Updated version
- Run the docker compose
sudo docker compose up -d
- Once finished, make sure all the containers are running
sudo docker ps
- Visit localip:8080 to connect
- administrator
- admin